LUUM.IO
AMATIS - ADVANCED PROGRAMMING GUIDE#
About This Guide#
Welcome to the advanced programming guide for the Amatis Lighting Control System. In this guide, you'll find straightforward explanations of the scene configuration options. Whether you're looking set up occupancy controls, or enable a control slider in the app, this guide will walk you through the process with ease.
Necessary Parts#
The following parts will be necessary to complete this guide:
- A functional Amatis lighting controls system
- Amatis wireless control devices, such as motion sensors, wall switches, or input devices
- Amatis wireless load controllers or X-PoE switches
System Setup#
Before getting started with the programming configuration, ensure all devices are properly connected. Once a location in the app has been set up, and devices are in the location, programming configuration can begin.
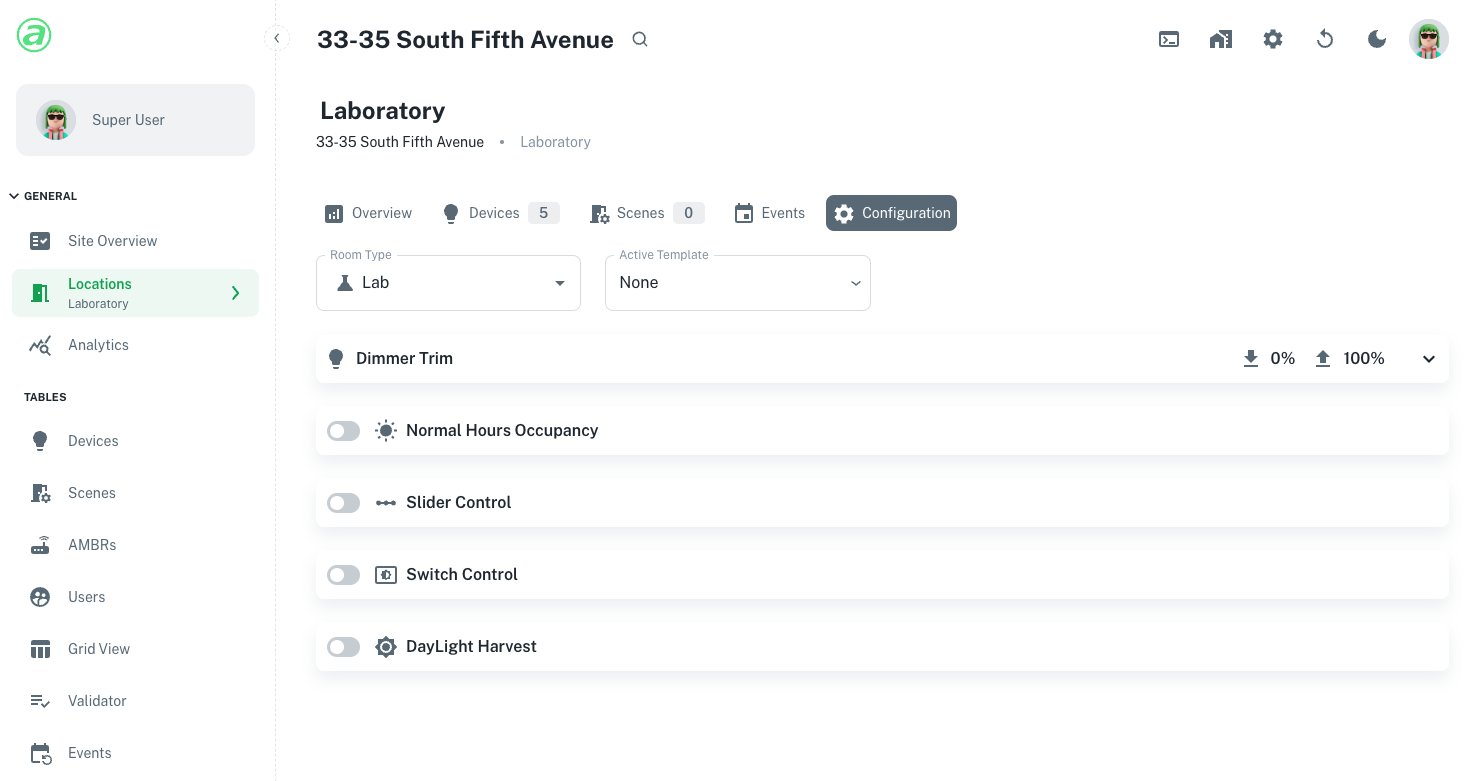
Dimmer Trim#
To set the high and low end trim for the location, select the dropdown arrow in the top right corner of the dimmer trim option, and adjust the left and right ends of the slider.

This feature sets the highest and lowest levels allowed in a location (other than 0%, off). The default settings are 100% for high end trim, and 0% for low end trim.
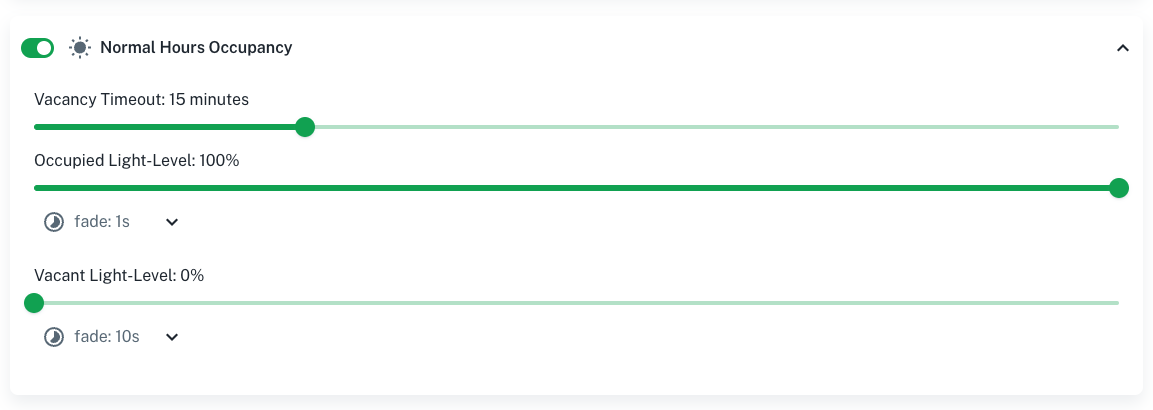
Normal Hours Occupancy#
To enable occupancy control, toggle on the "Normal Hours Occupancy" option. Select the dropdown arrow in the top right corner to customize the controls.
Note
This option will only be available if there is a motion sensor in the location.
Vacancy Timeout#
This setting controls how long the lights will stay on after occupancy was last detected. Default timeout is 15 minutes.
Occupied Light Level#
This setting controls the level the lights go to upon detecting occupancy. Default occupied light level is 100%.
- Fade: This setting controls the duration of the fade as the lights turn on upon detecting occupancy. Default occupied fade time is 1 second.
Vacant Light Level#
This setting controls the level the lights go to after the vacancy timeout is reached. Default vacant light level is 0%.
- Fade: This setting controls the duration of the fade as the lights turn off upon detecting vacancy. Default vacant fade time is 10 seconds.
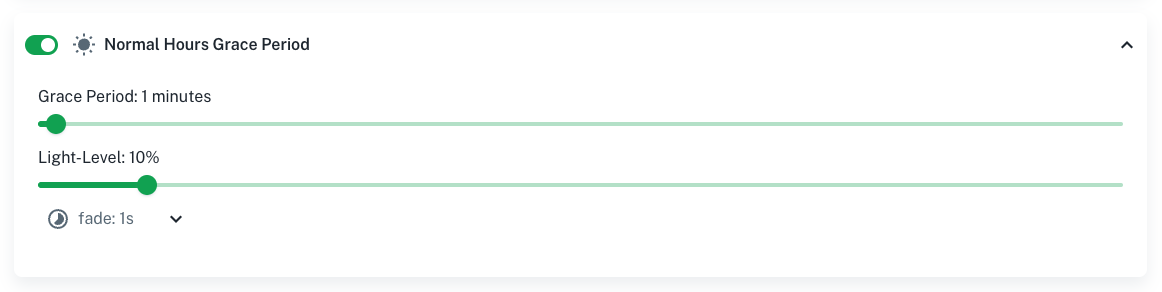
Normal Hours Grace Period#
To enable a grace period for normal hours occupancy, toggle on the "Normal Hours Grace Period" option. Select the dropdown arrow in the top right corner to customize the controls.
Note
This option will only be available if Normal Hours Occupancy is enabled.
Grace Period#
This setting determines how long before the motion timeout to activate the grace feature. For example, if you set a 45-minute occupancy timeout, with a 30 minute grace period, this feature will dim the lights down to the grace period light level after no occupancy detection for 15 minutes. After an additional 30 minutes of no occupancy detected, the lights would dim down to the vacant light level. Default grace period is one minute.
Caution
The grace period time should not be greater than or equal to the vacancy timeout.
Light Level#
This setting controls the level the lights go to upon entering the grace period. Default grade light level is 10%.
- Fade: This setting controls the duration of the fade as the lights turn off upon entering the grace period. Default grace fade time is 1 second.
After Hours Occupancy#
To enable after hours occupancy control, toggle on the "After Hours Occupancy" option. The control options in the dropdown are the same as Normal Hours Occupancy, with different default values.
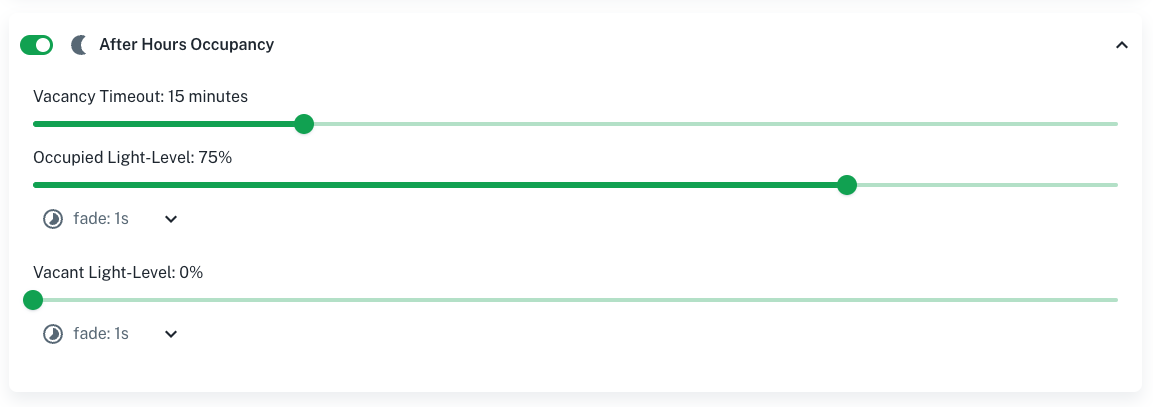
This feature allows a space to have two different occupancy behaviors. In order to fully configure this feature, Normal Hours & After Hours will need to be set up.
Note
This feature is most commonly used to allow for dimmer light levels and shorter timeouts during less active parts of the day/night. However, despite their naming convention, this feature can be used for whenever a different set of occupancy rules is desired.
After Hours Grace Period#
To enable a grace period for after hours occupancy, toggle on the "After Hours Grace Period" option. The control options in the dropdown are the same as After Hours Grace Period.
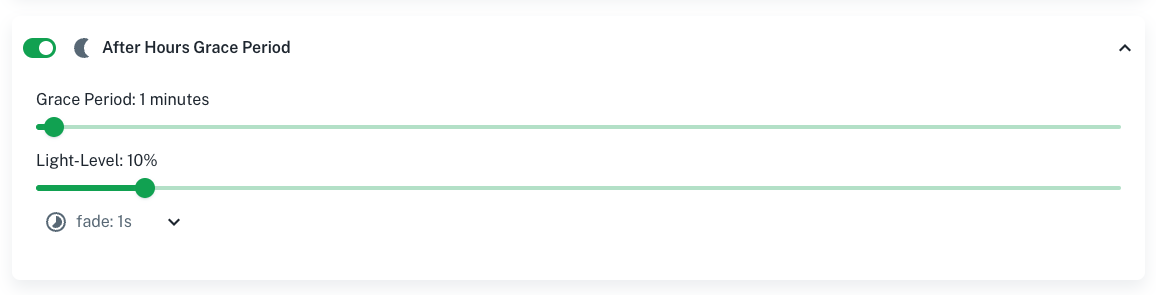
Note
This option will only be available if After Hours Occupancy is enabled.
Normal Hours/After Hours#
In order to trigger the After Hours Occupancy and Grace Period functionality, this option must be enabled:

This will generate a normal hours and after hours scene that will trigger all of the devices in the location to go into normal hours or after hours mode respectively.
Note
The devices will remain in "normal hours" mode until these scenes are activated. To switch between normal and after-hours modes, additional programming is required. This involves setting up schedules or specific triggers to activate the appropriate scenes at appropriate times.
Slider Control#
To enable a control slider for the location in the app, toggle on the "Slider Control" option.

This will generate a controls slider for the location in the app.

Note
The programming configuration settings will need to be saved before the slider will be available in the app.
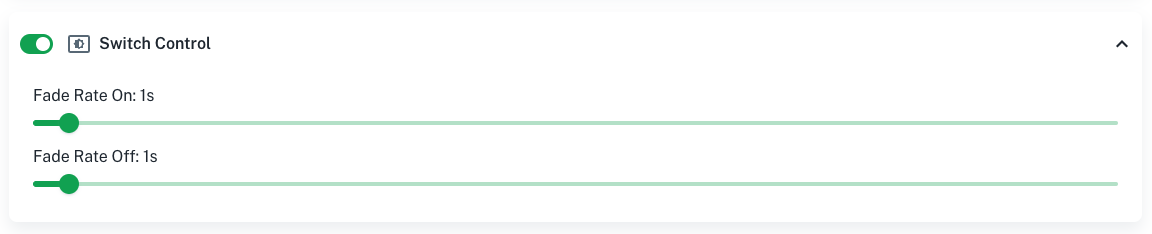
Switch Control#
To enable wall switch control, toggle on the "Switch Control" option. Select the dropdown arrow in the top right corner to customize the controls.
Note
This option will only be available if there is a wall switch in the location.
Fade Rate On#
This setting controls the duration of the fade as the lights turn on when a wall switch is pressed. Default fade rate on time is 1 second.
Fade Rate Off#
This setting controls the duration of the fade as the lights turn off when a wall switch is pressed. Default fade rate off time is 1 second.
Daylight Harvesting#
To enable daylight harvesting, toggle on the "Daylight Harvesting" option.

This feature allows the lights to dim when there is enough light from other sources to achieve the target light level. Follow these steps in order to properly configure daylight harvesting:
-
If a light meter is being used, place it under the specified daylight sensor. Otherwise, visually observe the location to determine the optimal light level.
Note
Using a light meter is highly recommended when choosing a target light level, as having the target level too close to the maximum achievable brightness of the room will cause daylight harvesting to not function as intended.
-
Using the slider in the app, adjust the light levels until the desired light level in the room is reached.
Note
"Slider Control" must be enabled and synced in the location in order to get a slider in the app.
-
Press the "Set Current Measured Light Level As Target" button in the daylight harvesting programming option.
Daylight harvesting is now setup, and the light levels will automatically adjust to attempt to achieve the target light level.
Apply Configuration#
After any programming configuration change is made, the settings need to be applied. Select "Apply this configuration" at the bottom right of the page.
