LUUM.IO
AMATIS - CUSTOM PROGRAMMING GUIDE#
About This Guide#
Welcome to the custom programming guide for the Amatis Lighting Control System. In this guide, you'll find straightforward explanations of how scenes work and step-by-step instructions on how to set them up. Whether you're looking to use the default scenes, adjust current ones, or create brand new scenes to match your needs, this guide will walk you through the process with ease.
Necessary Parts#
The following parts will be necessary to complete this guide:
- A functional Amatis lighting controls system
- Amatis wireless control devices, such as motion sensors, wall switches, or input devices
- Amatis wireless load controllers or X-PoE switches
System Setup#
Before getting started with custom programming, ensure all devices are properly connected. The devices should be in locations within the app, and configuration options such as motion and switch control already applied (if editing existing scenes). Once a location in the app has been set up, and devices are in the location, custom programming can begin.
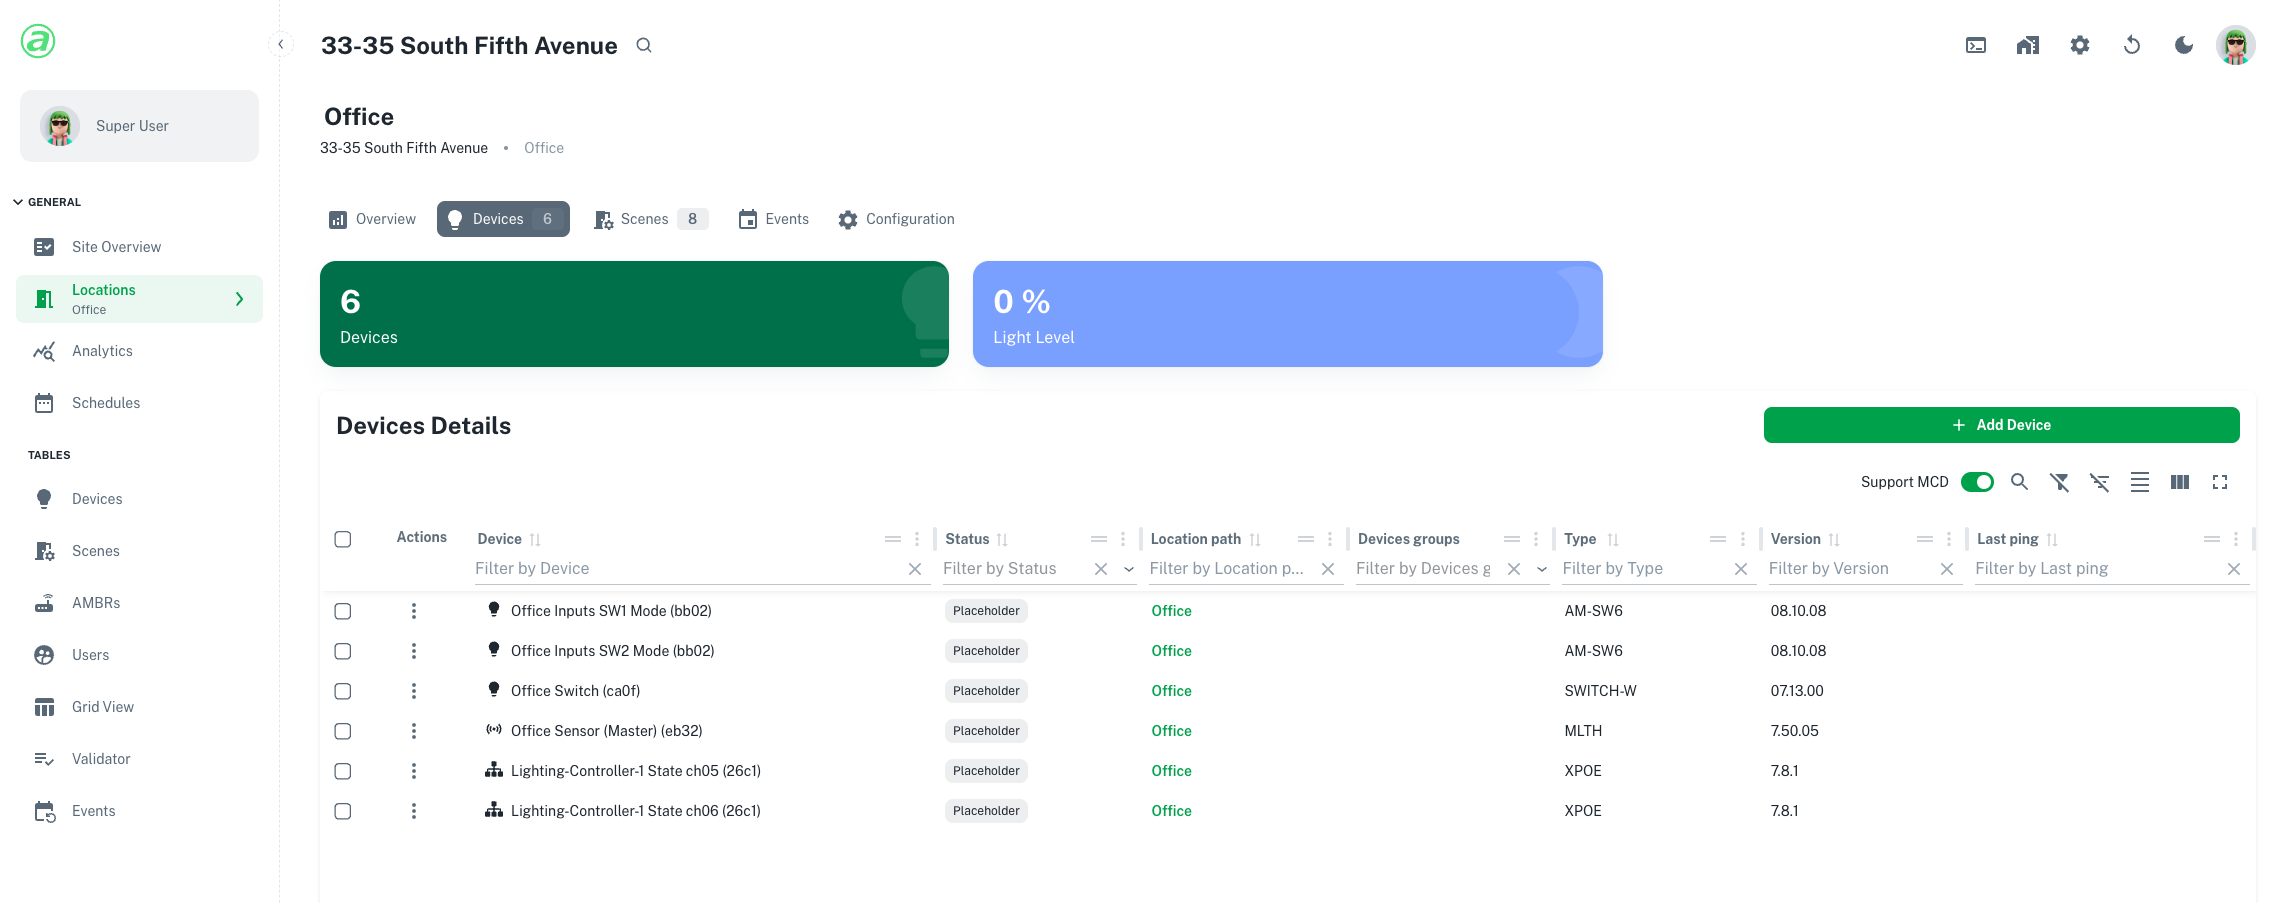
Step 1: Create New Scene#
To create a new scene, navigate to the "Scenes" tab of a location and select "Add New Scene":
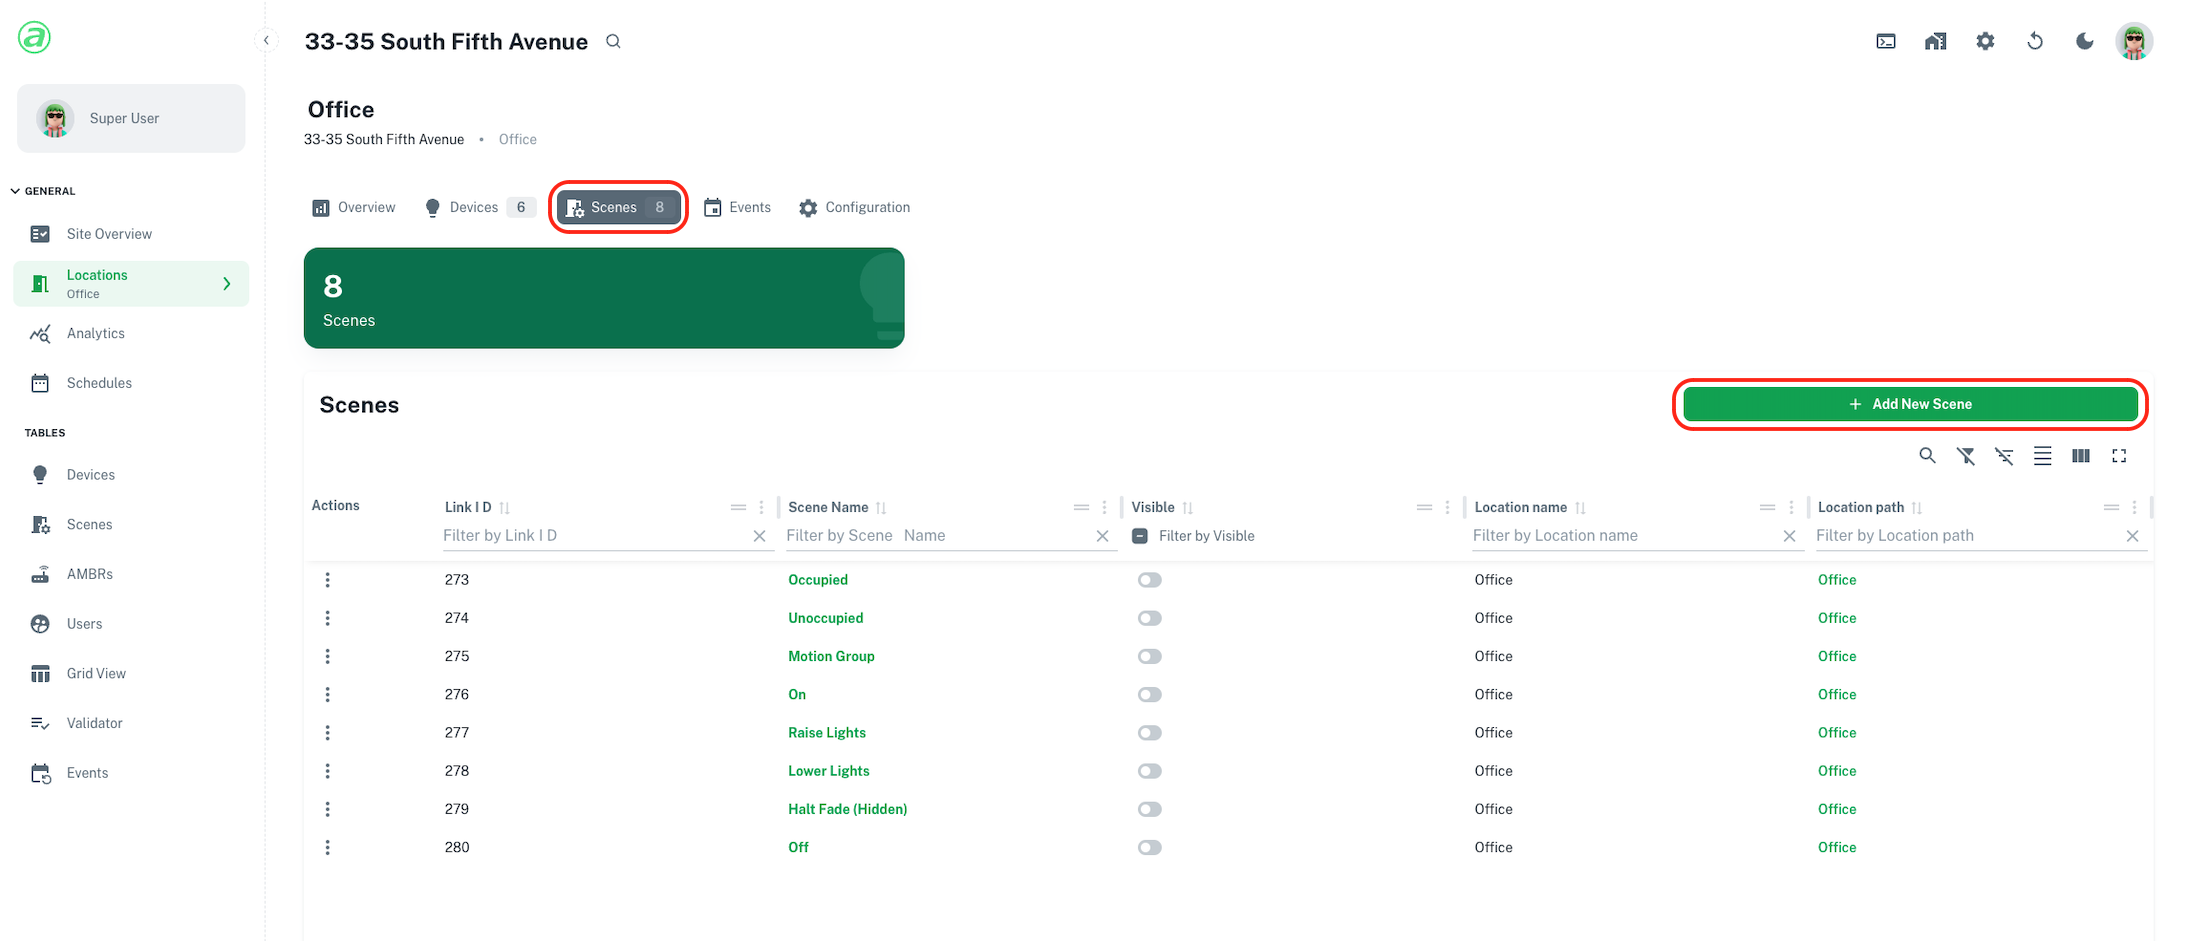
Default Scenes
If any configuration options have been applied to the room, default scenes will have been generated. These scenes can be edited by clicking on them and following the same instructions below.
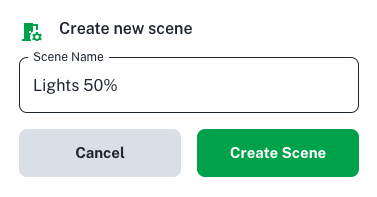
Give the scene a name, and select "Create Scene":
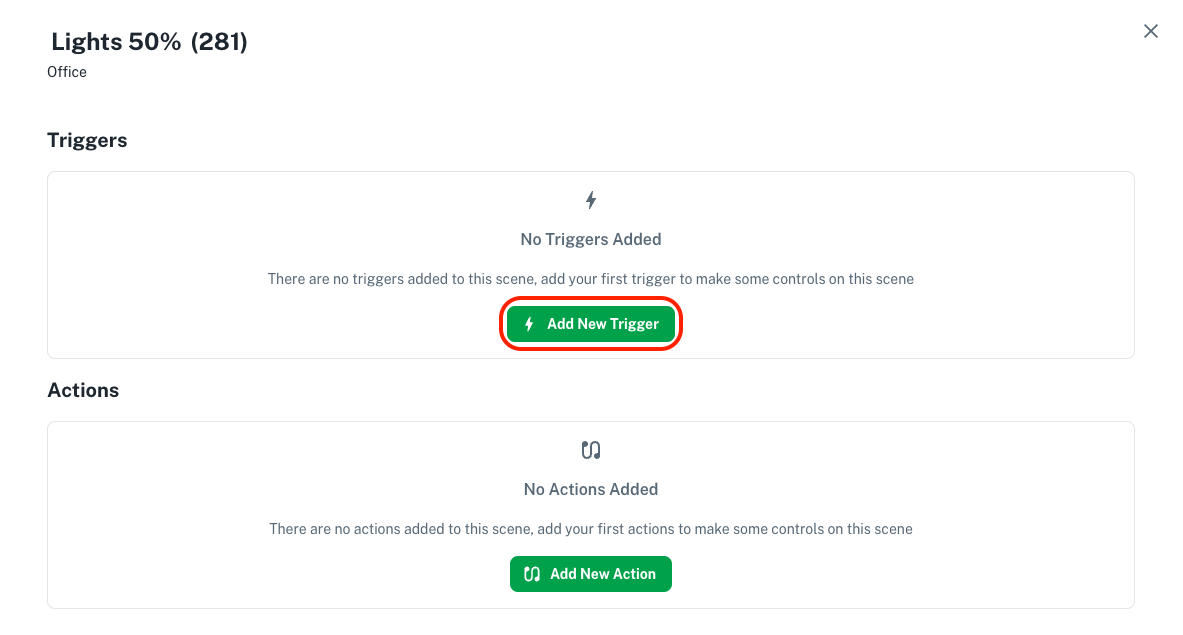
Step 2: Triggers#
Inside a scene, you will see 'Triggers' and 'Actions'. Triggers are events that cause the scene to activate. To add a trigger, select "Add New Trigger":
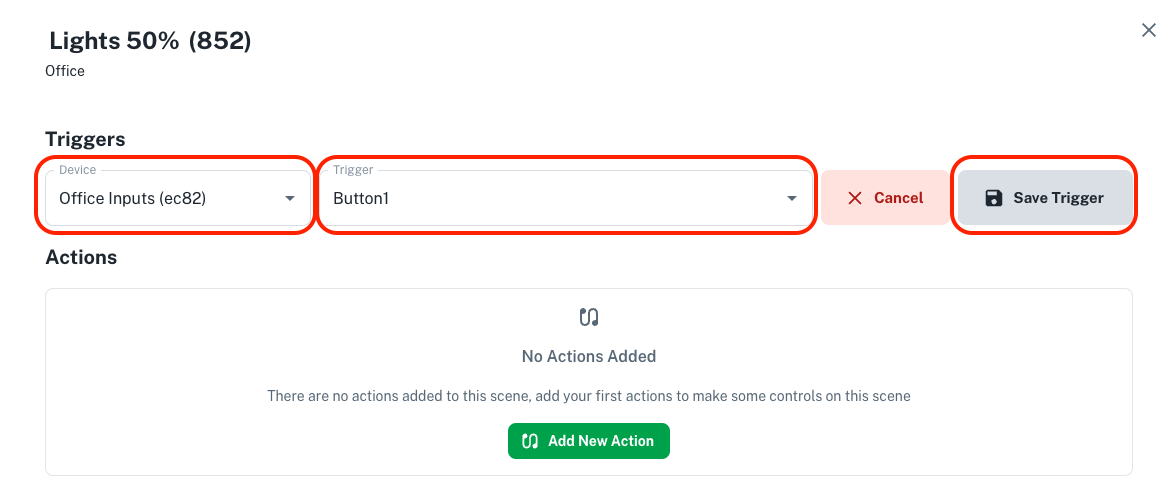
In this example, there already is a wall switch with default switch control doing the on and off scenes. However, there are two inputs from an Amatis AM-SW6 wireless input device in the location as well. Button one of the input device will be used to trigger this custom scene.
Select the input device in the "Device" field. To trigger on the press of button one, select "Button1". Select "Save Trigger" to save the trigger to the scene:
Multiple Triggers
Scenes can have as many or as few triggers as desired. They can even have no triggers if they are intended to be triggered from the cloud.
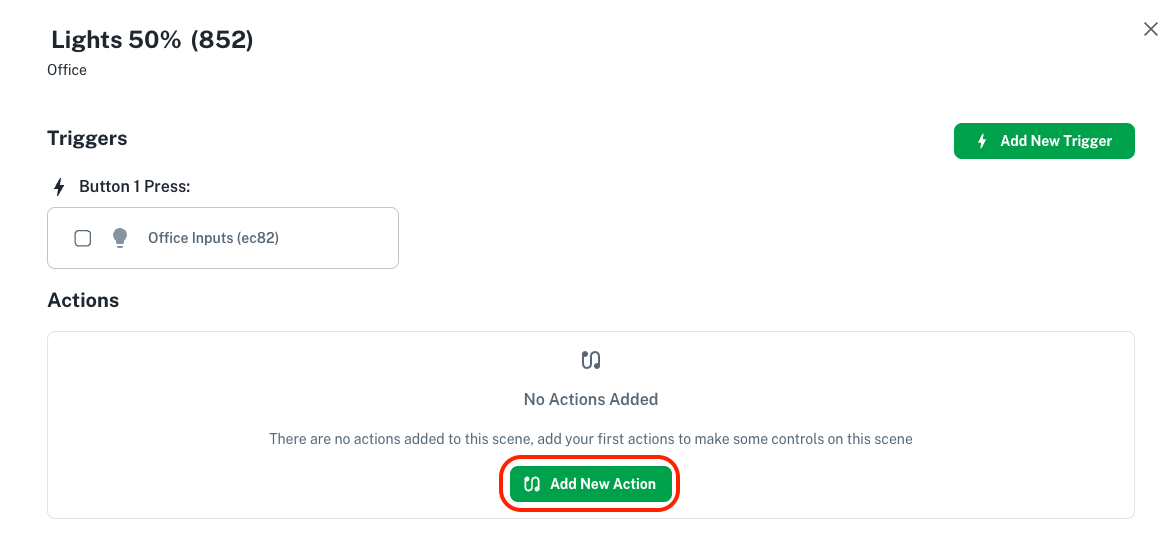
Step 3: Actions#
Actions are the changes that occur when the scene is activated. Once the triggers are in place, select "Add New Action" to add an action to the scene:
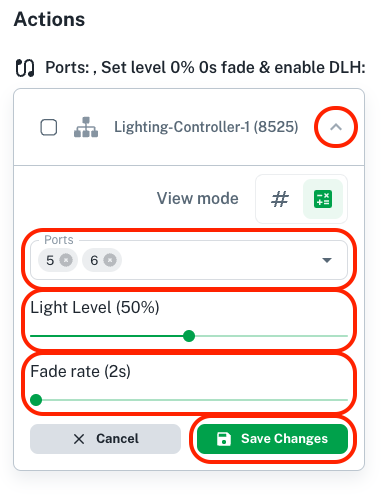
In this example, there are two X-PoE ports in the location. This scene will be programmed to set those ports to 50%.
Select the output device in the "Device" field. To control the level of an X-PoE port, select "Set Auto Level Port (mask,%,fade)". Then select "Save Action" to save the action to the scene:

Once the action is saved, edit the action by dropping it down. In this action, the ports to be controlled can be defined, as well as the level they should go to and fade time to use. Select "Save Changes" to update the action:
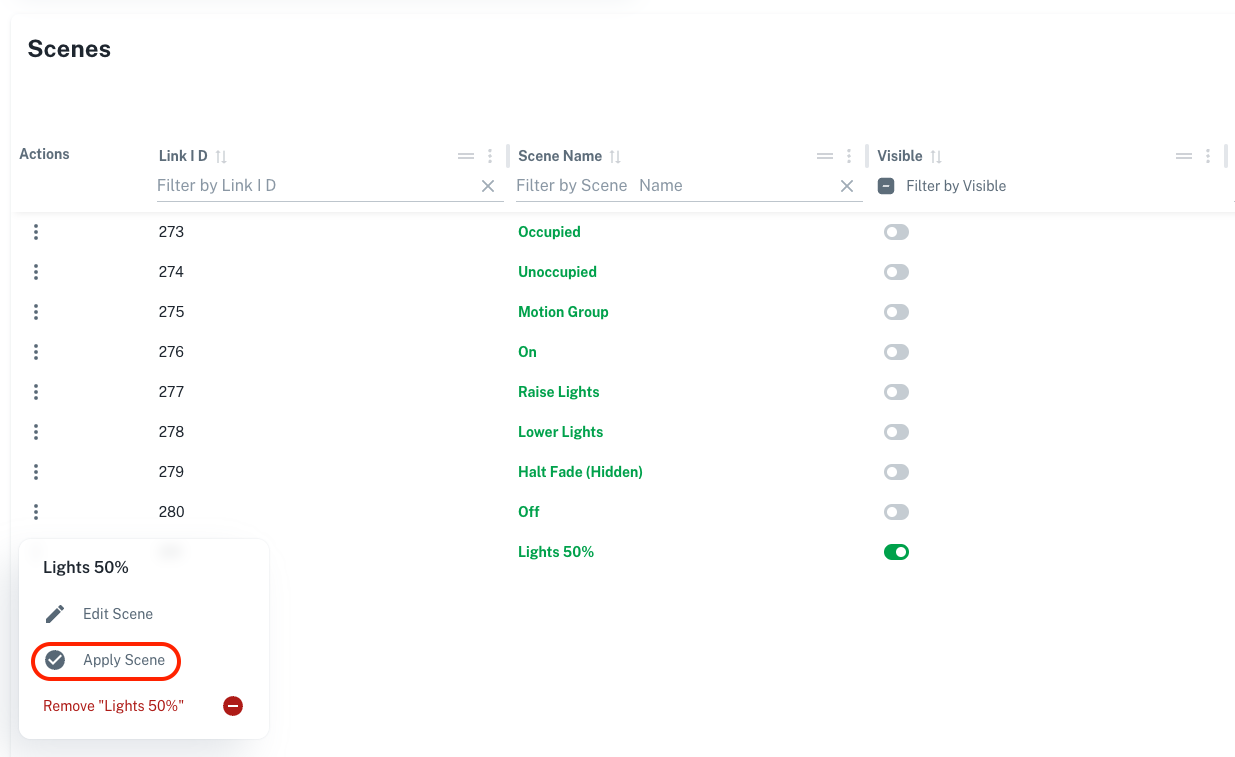
Step 4: Sync & Test#
Once the scene is configured, sync the devices in order to upload the new programming. The scene can then be tested by selecting the actions menu for the scene in the scene tab, and selecting "Apply Scene":
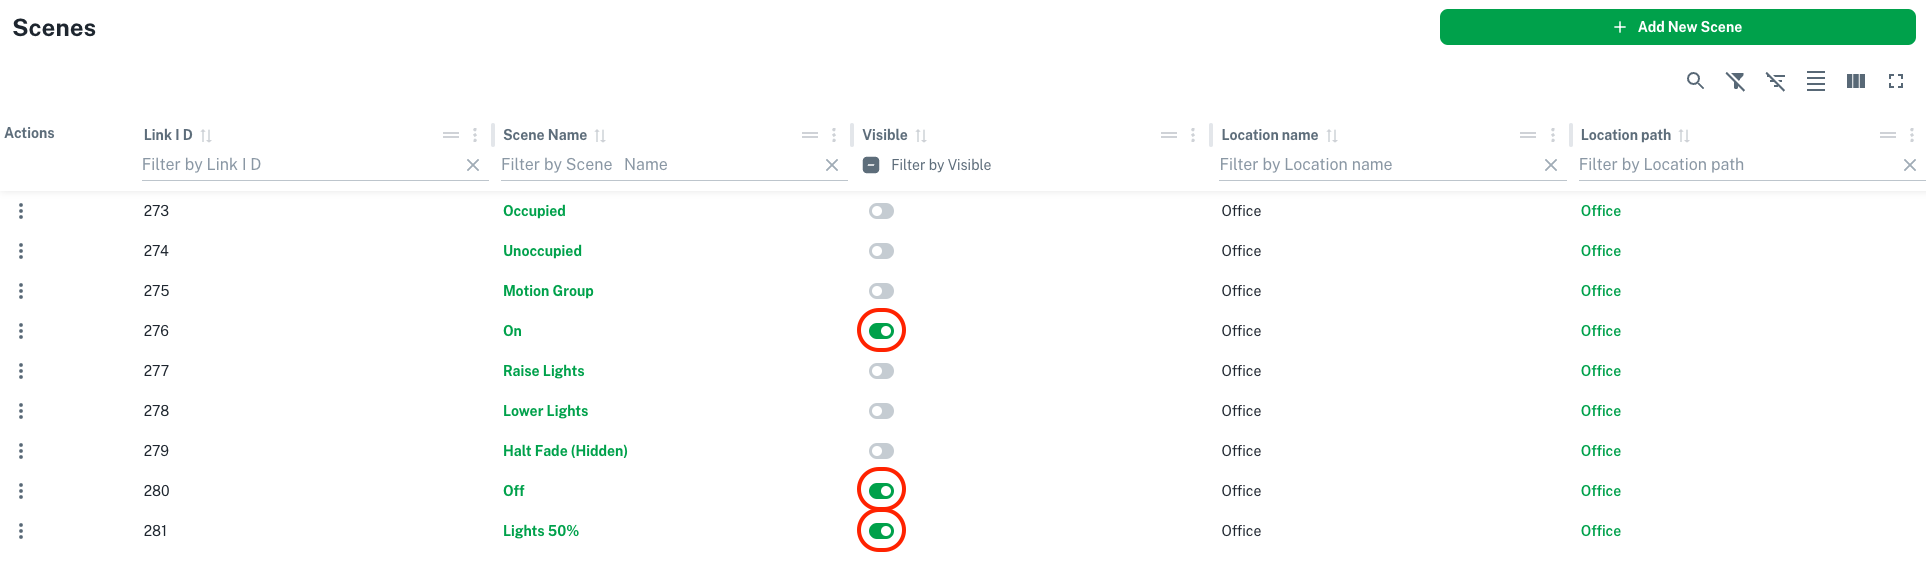
Scene Visibility#
If you would like the scenes to be visible in the app, and have buttons to activate them, select the visibility toggle for any given scene in the scene tab:
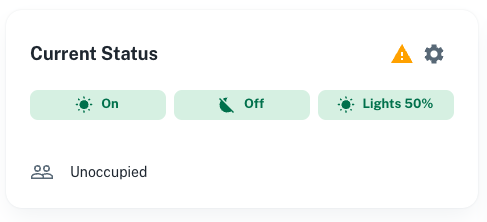
This will create a button to activate the scene from the overview tab of the location:
Advanced Options#
Trigger Definitions#
Here are the definitions for the common available triggers in the Amatis system:
| Wall Switch Triggers | |
|---|---|
| Top Release Bottom Release |
Trigger when the top or bottom button is released after a press |
| Top Long Press Bottom Long Press |
Trigger when the top or bottom button is pressed and held for an extended period |
| Top Long Release Bottom Long Release |
Trigger when the top or bottom button is released after a long press |
| Input Triggers | |
|---|---|
| Button# Button#_Release: |
Trigger when the input is activated or deactivated after a short activation, with the number indicating the specific input |
| Long_Press# Long_Release#: |
Trigger when the input remains activated or deactivated after a long activation, with the number indicating the specific input |
| ToggleOn# ToggleOff#: |
Trigger when the input is toggled on or off using a short press, with the number indicating the specific input |
| Button#_#Pulse: | Trigger when the input is pulsed a certain number of times, with the first number indicating the specific input, and the second number indicating the number of pulses, up to 3 times |
| Other Triggers | |
|---|---|
| onBoot | Trigger when the device initially powers up |
Advanced Triggers
Advanced triggers, such as motion, daylight, and load shed, should be enabled through the configuration tab and the generated scenes may be edited if necessary.
Action Definitions#
Here are the definitions for the common available actions in the Amatis system:
| Output Level Actions | |
|---|---|
| Set Auto Duty/Level Manual Duty/Level |
Set the target light level and fade time (on specified channels, if applicable) |
| Set Auto Duty/Level Port Set Manual Duty/Level Port |
Set the target light level and fade time on specified ports1 |
| Halt Fade | Stop any ongoing fade (on specified channels, if applicable) |
| Cloud Dim | Allow control via the in-app slider |
Auto vs. Manual Duty/Level
Set Manual Duty/Level will ignore daylight control, Set Auto Duty/Level will go to the target level and allow daylight harvesting to take over if enabled.
| Color Tuning Actions | |
|---|---|
| Set Target Color Set Target Color Auto |
Set the target color temperature, target level, and fade time on specified ports1 |
| Increment Color Decrement Color |
Increase or decrease the color temperature by a specified amount on specified ports1 |
Color tuning is only available on X-PoE switches and should be used exclusively when adjusting port levels for color-tunable fixtures. This prevents both fixture channels from being set to 100% simultaneously, which would result in excessive brightness. To ensure proper operation, the X-PoE switch channels must be set with load types that match the warm and cool LED color temperatures of the fixture.
Advanced Actions
Advanced actions, such as device modes, device calibration, and functionality enabling, should be reserved for very unique use cases. More information on these actions can be requested from the support team.